Nanny was not a person I ever met. She was employed as a nanny for my grandfather when he was a small boy in the late 40s and 50s. Eventually he grew up and she went to work for another family but once she retired, she came back to live with him and his own family. She had a suite of two armchairs and a sofa in her little cottage. By all accounts she was a formidable woman, small as she was! Eventually, this furniture passed to my dad when he was in need of some after a house move. I grew up with these chairs, which lost their loose covers and were left with the unattractive grey/green underlayer on show. I loved the armchairs in particular, they were wide and low and very comfortable for a small girl to curl up in front of the fire on a winter’s afternoon.
These pieces have all long since been replaced but they have stayed in my parent’s house and my dad’s office. I wanted an armchair to work on next and it occurred to me that if I worked on one of these, I would be recycling a loved piece that would just be collecting dust otherwise. After I’d persuaded my parents I could rip apart a treasured family heirloom, we wedged it in my car and I brought it back to my house. It took 2 sessions, 6 hours and 5 large bin bags to clean the chair down to the frame. I was hoping to find treasure hidden down the sides but I had to settle for some ‘new’ ten pences pieces, shillings and a hairpin.


As I went back through the layers, I found a solid wooden frame, good quality box springs and mesh frames on both the back and seat. This ended up saving me a lot of time although I didn’t appreciate it until I did other sprung projects!
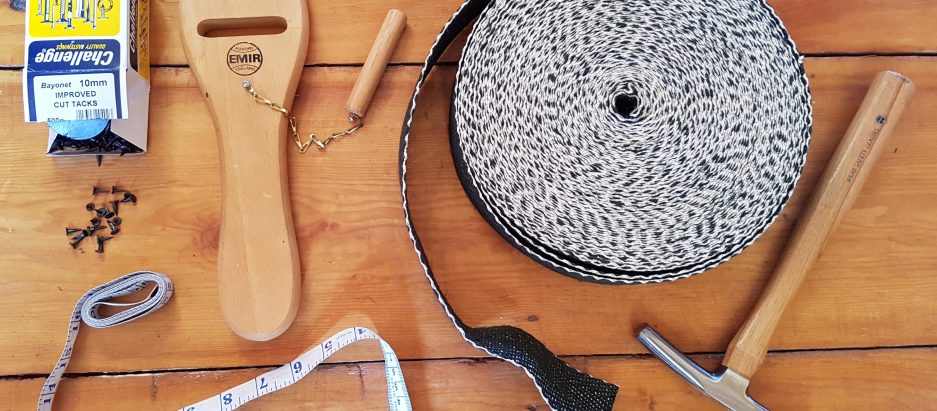
It was a daunting project to start, but start I did. The hessian that went over the mesh and springs was a heavier grade than normal to withstand the wear and tear of having a metal frame rubbing against it. The pieces were tacked onto the frame, giving it a little bit of tension, and the blanket stitched onto the frame using a curved needle. I then did the same again for the frame of the back of the chair as well as the arms and the inside of the wings. Because these are just wood, they had the lighter weight hessian which you can see is a slightly different colour in the pictures.


The stage was a familiar one by now. Vertical lines of bridling, filled with coir sausages, onto the back of the chair. I did rip quite a bit of the twine out when I was tightening the bridling as I hadn’t appreciated the the heavy duty hessian has less flexibility so just ripped when the twine is pulled too tight. I also added coir to the wings before laying a huge piece of cotton felt over the back, followed by calico, then repeating for the wings.
I yet again repeated the process for both arms, and suddenly I had a chair that was actually looking quite comfortable!


At this point we had reached the summer holidays at college. All of my posts so far represent one academic year’s worth of work, plus the two chairs I had left at home. This was frustrating because I finally felt on a roll with my chair and I had to stop for a few months! Thankfully my tutor puts of a summer school so I took three days of leave and had a huge upholstery fix in the middle of July. I can really recommend a full day class because you get so much more done. In my normal two hour lessons, you might learn a new skill and have a go at it, but once you hit your rhythm it’s time to leave. I decided my aim was to cover all of the calico with top fabric. This meant I needed to finally decide what this chair was going to look like.
I was recommended a warehouse in Northampton and wasn’t disappointed at all. When you first walk in, you go through a room of clothing fabrics, then a room of pricey but beautiful upholstery and curtain fabric. The final two rooms then had discounted rolls at various price points. I had been advised I needed at least 9 metres of material so I had prepared myself for an expensive purchase. I ended up falling for a very dark grey/blue heavy cotton material with a floral pattern woven into the fabric. When I asked how much it was going to cost me I couldn’t quite believe my ears when she said £1 a metre. I splashed out and got 10.
I also went on a hunt for foam for the box cushion. Again, on a recommendation from college, I took a pattern I had drawn on a large piece of paper so a firework/foam shop. You might find the combination odd but apparently the storage regulations were similar so maybe there are more out there. They offer an online service but I was much more confidant being able to discuss the cushion. They gave me great advice on which density to go for, checked that my pattern was symmetrical and cut it out in front of me. If only cost around £20.

I then twiddled my thumbs for a month or so, waiting for summer school to begin.
Once back in the classroom, I was definitely on a mission. I first stuffed the seat of the chair, not using too much coir as it was going to have a box cushion sitting on top. Then cotton felt, reaching right under the rail under the arms, and calico were added. Because the front of the chair has springs, the calico was stitched onto the hessian, level with the metal frame, rather than being taken down to the wooden frame and tacked on.


At this point, I was finally ready to start adding some top fabric! It was just a run through of the previous panels I had covered so I started with the back, then did the wings, arms and base. For each panel, I first adjusted the temporary tacking of the calico, pulling it tighter if need be, then hammered those tacks in fully. The only exception to this was the back of the back, where the tacks had to stay temporary as subsequent layer of fabric had to be drawn through from the front. After the three day course was over, I had achieved my goal and had no visible calico left.
This left me yet again with no chair for several more weeks. Over the summer, I had purchased an old Singer sewing machine from a Facebook selling group. It’s a lovely old machine and I decided to use it to have a go at making a calico slip cover for the cushion. I don’t have any experience in pattern making so I kept things simple. Using the same pattern I had used when I got the foam cut, I cut out two pieces from calico. I then also cut out several rectangles for each side panel of the cushion. I then pinned the whole lot onto the foam. The first part I machine were all of the rectangles, so I ended up with a loop of calico where the joins lined up the corners of the foam. Then I put it back on the foam and pinned on the top panel. I sewed this on next, as you can see from the photo the concave corners were tricky! I decided this would be the bottom panel. The other panel I sewed on by hand using ladder stitch, stopping every now and again to check that I hadn’t caught any foam with my stitches. This layer is not designed to come off so I kept stitching until I have completed the cover. Also at this point my machine broke and started sewing uncontrollably with outside control but that’s a story for another post.


This brings us up to the start of the new academic year and I was so keen to get started and finish. It look so tantalisingly close but there was still a fair way to go. I started by adding top fabric to the front bottom of the chair. A layer of cotton felt was glued in place and then top fabric was sewn onto the fabric already in place on the seat. The bottom of this piece was tack on like normal. Next came piping. I used a bigger size of piping cord, 5mm rather than the 4mm I had used for Laura’s maternity chair. It was more in proportion with the bigger chair. I had to make 7m and I hadn’t anticipated how hard it would. I assumed, having made piping before, it would be easy. Instead I spent a whole two hour session getting more and more annoyed with the industrial sewing machine that kept getting tangled, snapping threads, and the fact I attached several pieces with the fabric upside down. Eventually I gain control of the machine, only to stitch a fair way with an empty bobbin. It was irritating to say the least. However, I did get it done, which meant the following week I was able to start on the back of the wings. The piping was initially pinned in place, right across the back of the chair. Once I was happy with the positioning, I tacked it all in place.


From then on the outer wing panels were pretty straight forward. Being a bit of neat freak, I folded the calico over as I tacked but you could easily not do that and then just trim it afterwards. I then stitched on some polyester wadding and then attached the top fabric, ladder stitching along the piping and tacking onto the frame.
Next came the sides. I spent the whole lesson on one side only to turn it over and realised I had messed it up badly. You take top fabric, calico and back tacking and line them all up, upside down, at the underside of the arm. You tack through all three layers and when you turn it over, you have a smooth, straight line from which all the fabric hangs. However, I did not realise the fabric also has to have enough overlap at the front to reach round and get tacked onto the front of the arm. I pulled mine down and realised it was too short. My lovely tutor placated quite an angry version of myself, saying we could sew an extra panel on to make it reach. Over the week that followed however, I knew I would have to take it off and start again. As chance would have it, I got stuck in traffic the following week and by the time I arrived, I had less than 40 minutes worth of lesson left. Unwilling to leave the chair with only backwards progress, I took it home and did both side panels during the week.
Getting ever tantalisingly closer, I had reached the back. Although it was a large expanse of fabric, it was the same process at the wings. If the top of the chair had been straight, I could have used backtacking, however due to the curve it was easier to do the whole thing as separate layers. I tacked on calico, trying to keep the tension as even as possible, then stitched on polyester wadding and pinned on the top fabric. Then there was a lot of ladder stitching. By the end of the session, all I had left were the front of the arms.
They first were piped in tandem, to make sure the final shape was symmetrical. Then I attached some polyester wadding to pad them out. Finally I pinned on the top fabric, tucking in underneath itself as I went along, ready to be stitched.


At this point I could have jumped for joy because to all intents and purposes my chair was finished. This happened at the end of the last lesson before the Christmas break which meant from start to finish it had taken 9 months, minus three for holidays, pretty much only in the weekly two hour sessions.
In reality I had one more mountain to climb before I could really call it finished: the cushion. I wanted to make it washable so I ordered a navy zip from eBay. It wasn’t exactly the same colour but it is hidden from view by the design of the cushion. To hide it, I stitched a hem into a band of top fabric, the attached this to the zip. I then made a hem in a second piece of fabric and lined it up so it mostly covered the zip. I then used the resulting rectangle of fabric as the back panel of the cushion cover. I used the same technique as the calico cover to make the rest, but sewed the whole thing by hand as my sewing machine was out of action. The only difference was I added piping to the cover but the technique – lots of ladder stitch, was the same.


There are further things I want to do to the chair – take off the little casters and add big round feet to lift it a little higher off the ground for example. But for now the chair has pride of place, in my bedroom, and is the perfect place to curl up with a good book. I even have another one so I could make it a pair at some point.. I think that can wait for now.
