When I started upholstery, I didn’t think I would be doing this for very long so I kept purchases to a minimum. Because I learn at a college, I could get away with having no tools at all and borrow everything during my lessons. However this is definitely not an option as I am horribly competitive with myself and need the resources to carry on my projects at home.
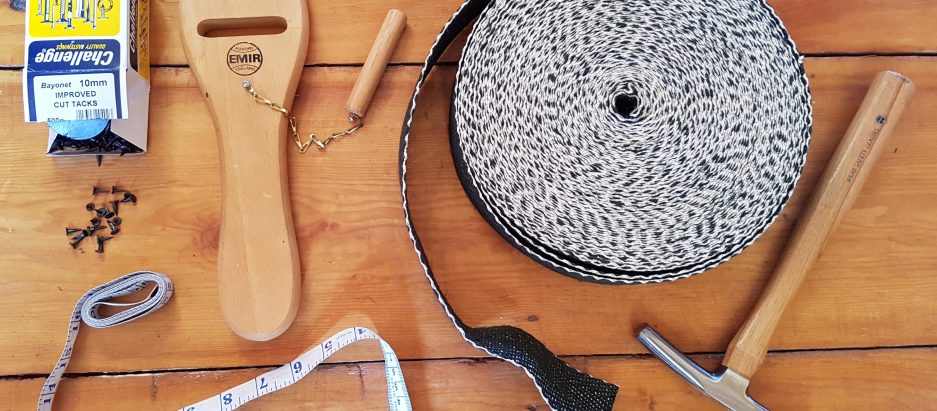
The first thing I bought, before my first lesson, was a basic sewing kit. I went to my local supermarket, got to the sewing end of an aisle, and bought one of each of the following:
- large scissors
- embroidery scissors
- needles
- pins
- thread in a few different colours
- measuring tape
I didn’t buy a sewing bag or box so I had to empty out my nail varnish bag in order to have something to carry my things to class with me. This appalled one of the first friends I made in class who gave me a new sewing box she had lying around the following week.
This was enough to start me off, the bigger tools came later. The first time I had a chair at home to strip down I used a heavy claw hammer and a screwdriver to remove the tacks.. it worked but if you don’t mind spending a little bit of money, there is a better way!
At various points in time, there will be packaged up deals of upholstery tools on the likes of Amazon, eBay etc. You probably don’t need everything in the kit. The first things I bought were a Draper Upholstery Magnetic Tack Hammer 19724 and Tack Lifter 64804 from eBay. The magnetic hammer was the biggest revelation when I started. Being able to stick a tack on the end and not have to use a hand to hold it in place when you need your hands for the hammer and pulling fabric tight is amazing. There are still times when you need an extra pair of hands which is why it is such a good idea to go to a class or workshop every now and again.
I’ve since expanded my arsenal further with a pair of carpenter’s pincers (from my sister for Christmas), various curved needles, mattress needles, a glue gun, Stanley knife, more pins, and an electric staple gun. I even got an amazing upholsterer’s trunk from J. A. Milton as a birthday present last year to put everything in.
The other great tool I found was not designed for upholstery at all. When you start stripping chairs down, you will begin to loathe staples. Anything modern is probably full of them and they are a nightmare to get out. If they are whole, carpenter’s pincers can get them, but if they break (which is highly likely), you need something smaller. I was introduced to using cuticle trimmers by one of my classmates who worked in a salon. He said they were the best thing he had found for pulling tiny shards of metal out of wood. I have since seen them in both the beauty and diy sections of various shops, but they are essentially the same thing. I got mine from Flying Tiger for a couple of pounds. This is a picture of the kind of thing I’m talking about:

Obviously you don’t need all the things I now have to get started. If you go down the modern route, all you need as a staple gun and some foam but your results will never be as long lasting or as satisfying as traditional upholstery. If you wanted to give it a go, but didn’t want to spend too much here is what I recommend as a starter pack:
- the basic sewing kit mentioned above
- a pack of curved needles in different sizes
- a mattress, buttoning or double ended needle
- a magnetic tack hammer
- a tack lifter
- a wooden mallet
- a cuticle trimmer
This would get you through something simple like a piano stool, a stuffover chair or even an armchair. The best thing is all these tools are pretty small, and easy to pack away when not in use. Happy upholstering!